Tesla Brake Rotor Replacement: Complete DIY Guide (2026)
Tesla brake rotors last 75,000–150,000 miles thanks to regenerative braking, but warped or grooved rotors cause pedal pulsation, noise, and longer stopping distances. DIY replacement costs $150–250 per axle in parts and saves $300–700 vs. a service center.
Quick Reference
| Spec | Value |
|---|---|
| Model 3/Y Standard — front rotor | 320mm diameter, 26mm min thickness |
| Model 3/Y Standard — rear rotor | 320mm diameter, 18mm min thickness |
| Model 3/Y Performance — front rotor | 355mm diameter, 32mm min thickness |
| Model 3/Y Performance — rear rotor | 335mm diameter, 22mm min thickness |
| Model S/X (2021+) — front rotor | 355mm diameter, 32mm min thickness |
| Model S/X (2021+) — rear rotor | 365mm diameter, 24mm min thickness |
| Lug nut torque | 175 Nm (129 ft-lb) |
| Front bracket bolt torque | 94 Nm (69.3 ft-lb) — new bolts required |
| Rear bracket bolt torque | 83 Nm (61.2 ft-lb) — new bolts required |
| Rotor retention bolt | 5 Nm (3.7 ft-lb) |
| DIY parts cost per axle | $150–250 |
| Total job time | 2–3 hours (all four corners) |
| Difficulty | Intermediate |
Table of Contents
- When Do Tesla Rotors Need Replacement?
- Rotor Specifications by Model
- What You'll Need
- Where to Buy Replacement Rotors
- Step-by-Step Rotor Replacement
- EPB Reset and Brake Bleed
- Bed-In Procedure for New Rotors
- Cost Comparison
- EV-Specific Rotor Rust: Why Teslas Are Different
- 2026 Model-Specific Notes
- Pre-Purchase Rotor Inspection (Used Tesla Buyers)
- Common Mistakes to Avoid
- After the Job: What to Check Next
- FAQ
- Torque Specifications
When Do Tesla Rotors Need Replacement?
Unlike brake pads, rotors don't have a set replacement interval. Replace them when you notice:
- Vibration or pulsing through the brake pedal when stopping
- Grooves or scoring visible on the rotor surface
- Thickness below minimum spec (measured with a micrometer)
- Cracks in the rotor surface
- Glazed or blue spots from overheating
- Uneven wear patterns causing a lip on the rotor edge
Measuring Rotor Thickness
Use a digital micrometer (not a ruler or caliper — too imprecise for this) at 8 evenly-spaced points around the rotor face. Minimum thickness applies to any single measurement point. Lateral runout above 0.05mm also warrants replacement even if thickness is within spec.
Measuring Lateral Runout
Rotor runout is the side-to-side wobble as the rotor spins. A rotor can be at full thickness and still cause brake pulsation if the runout is excessive. The brake pedal typically pulses once per wheel revolution — like a heartbeat — when runout is the cause.
What you need: A dial indicator with a magnetic base ($25–50 at an auto parts store).
Procedure:
- Mount the wheel without the caliper installed (rotor, hub, and lug nuts only)
- Clamp the dial indicator base to a fixed point on the knuckle or caliper bracket
- Touch the indicator tip to the rotor face, 10mm in from the outer edge
- Rotate the rotor one full revolution by hand while watching the gauge
- The total needle swing (max to min) is the lateral runout value
Interpretation:
| Runout | Verdict |
|---|---|
| 0–0.05mm | Pass — within Tesla spec |
| 0.05–0.10mm | Marginal — install a new rotor and re-measure. If runout persists, hub bearing is likely the source |
| Above 0.10mm | Fail — replace rotor. If new rotor also reads above 0.05mm, measure hub flange runout; the hub assembly may need inspection |
Checking hub runout before installing a new rotor: With the old rotor off, hold the indicator tip against the hub face and rotate. If hub runout exceeds 0.03mm, clean the hub face thoroughly and re-measure. Corrosion buildup on the hub face is the most common source of runout on high-mileage Teslas — a wire brush often solves it without any parts replacement. See the Tesla wheel bearing replacement guide if hub runout persists after cleaning.
Rotor Specifications by Model
Tesla uses different brake sizes depending on model, year, and trim. Always confirm before ordering.
Model 3 / Model Y — Standard (including 2024 Highland and 2024 Juniper)
The 2024 Model 3 Highland and Model Y Juniper refreshes carry over the same brake dimensions as their pre-refresh counterparts. Confirm your trim via the VIN decoder or Controls > Software > Additional Vehicle Information.
| Position | Diameter | Minimum Thickness |
|---|---|---|
| Front | 320mm | 26mm |
| Rear | 320mm | 18mm |
Model 3 Performance / Model Y Performance
| Position | Diameter | Minimum Thickness |
|---|---|---|
| Front | 355mm | 32mm |
| Rear | 335mm | 22mm |
Model S / Model X (2021+)
| Position | Diameter | Minimum Thickness |
|---|---|---|
| Front | 355mm | 32mm |
| Rear | 365mm | 24mm |
What You'll Need
Time Required: 2–3 hours (all four corners)
Skill Level: Intermediate
Special Requirement: Touchscreen access for EPB Service Mode (rear rotors only)
Replacement Rotors (choose one brand):
- OEM Tesla rotors — $100–150 each, exact fit, no adaptation needed
- Brembo OE-equivalent — $80–120 each, Tesla's actual OEM supplier for many models
- Power Stop Z23 Evolution — $70–100 each, carbon-fiber ceramic formula, low dust
- EBC Brakes Ultimax2 — $75–110 each, quiet, low-dust, strong wet-weather performance
- DBA 4000 series — $90–130 each, excellent heat management for repeated hard stops
Where to Buy Replacement Rotors
United States
- Power Stop Z23 Tesla Model 3/Y Front Rotors — Amazon US
- EBC Ultimax2 Tesla Brake Rotors — Amazon US
- Brembo OE-Replacement Tesla Rotors — Amazon US
- Brake Caliper Wind-Back Piston Tool Set — Amazon US
- 3-Ton Floor Jack — Amazon US
- 1/2" Drive Digital Torque Wrench — Amazon US
- Brake Parts Cleaner (12-pack) — Amazon US
Germany / Europe
- Bremsscheiben für Tesla Model 3/Y (320mm) — Amazon DE
- Drehmomentschlüssel 1/2" — Amazon DE
- Bremsreiniger Spray — Amazon DE
- Anti-Seize Kupferpaste — Amazon DE
Aftermarket Rotor Brand Comparison
Not all aftermarket rotors perform equally on a Tesla. Because regenerative braking keeps mechanical brakes mostly dry, the non-friction surfaces (hat, vane slots, outer edge) rust aggressively between brake applications. Coating matters more on a Tesla than on any ICE vehicle.
| Brand | Line | Coating | Best For | Price / Rotor (US) | Amazon US |
|---|---|---|---|---|---|
| Tesla OEM | — | Bare steel | Guaranteed fit, factory warranty | $100–150 | Tesla Shop |
| Brembo | OE-Replacement (UV) | Geomet / UV coat | OEM-equivalent, direct replacement | $80–120 | Brembo rotors |
| Power Stop | Z23 Evolution Cross | Geomet | Low dust, street + light track | $70–100 | Power Stop Z23 |
| EBC Brakes | Ultimax2 (MDX) | E-coated | Quiet, daily driving, wet weather | $75–110 | EBC Ultimax2 |
| DBA | 4000 Series (XS) | E-coated | Heat management, frequent hard stops | $90–130 | DBA 4000 |
| Hawk Performance | Quiet Slot | Zinc-coated | Slotted performance, reduced noise vs plain slotted | $85–125 | Hawk rotors |
European / German market (Amazon DE):
| Brand | Line | Amazon DE Link |
|---|---|---|
| Brembo OE | 09.D216.11 series | Brembo DE |
| Power Stop | Z23 | Power Stop DE |
| DBA 4000 | XS | DBA DE |
| Zimmermann | Sport Z (coated) | Zimmermann DE |
Which to Choose
- Daily driver in a dry climate: Brembo OE or Tesla OEM — lowest noise, longest life, no compromise
- Daily driver in wet / winter climate (Lithuania, Germany, UK, Pacific Northwest): Power Stop Z23 or DBA 4000 — Geomet / e-coating prevents the deep pitting that bare-steel rotors develop between brake uses on an EV
- Occasional track days: DBA 4000 XS slotted — better heat management under repeated hard stops
- Budget pick: EBC Ultimax2 — solid daily-driver performance with e-coated protection at the low end of the price range
- Avoid: Uncoated "economy" rotors from unknown brands — they will develop surface pitting within months on a Tesla in any humid climate
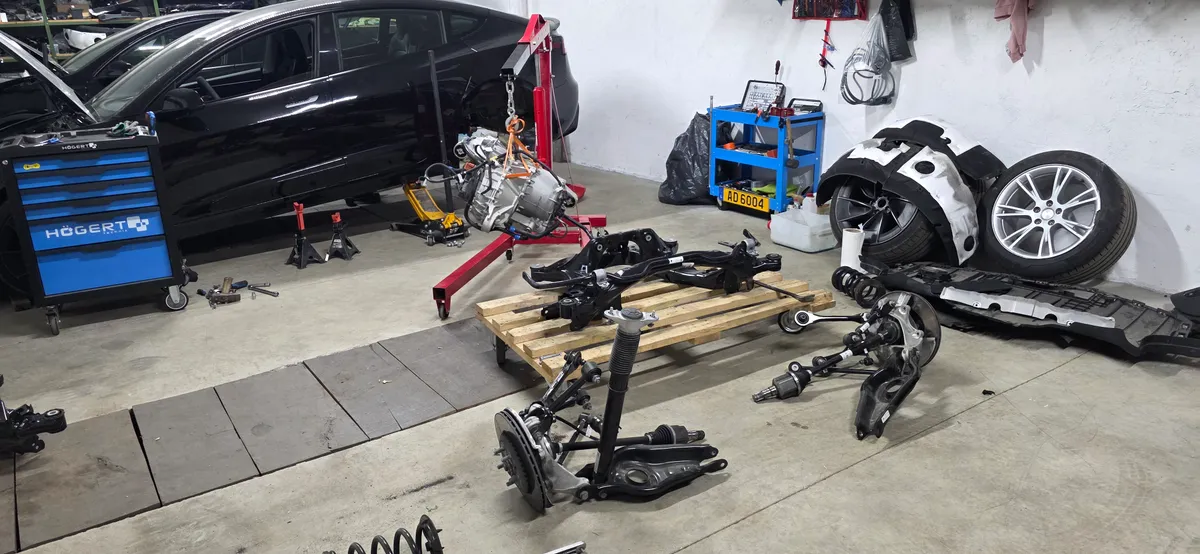
Step-by-Step Rotor Replacement
Preparation
- Park on a flat, level surface with the vehicle in Park
- Enable Jack Mode: Controls > Service > Jack Mode
- Confirm new rotor diameters match your vehicle trim before starting
- Have brake cleaner ready — new rotors ship with a protective anti-rust oil that must be fully removed
Lifting the Vehicle
- Locate your Tesla's correct jack points
- Use a Tesla-specific rubber puck to protect the battery enclosure lip
- Lift and secure on rated jack stands
- Remove the wheel: 21mm socket, torque to 175 Nm on reinstall
Removing the Caliper and Bracket
Unlike a brake pad replacement where you only pivot the caliper, rotor replacement requires removing the full caliper bracket.
Front Rotors:
- Remove both caliper-to-bracket bolts (21mm)
- Lift the entire caliper assembly clear of the rotor
- Support the caliper with a wire hook or bungee cord — never let it hang by the brake hose
- Remove the two caliper bracket-to-knuckle bolts (18mm)
Rear Rotors:
The electronic parking brake must be retracted before caliper removal:
- Enable EPB Service Mode:
- Navigate to Controls > Service > Chassis > Brakes > EPB Service Mode
- EPB Selection: Both
- Action Selection: Start
- Tap Run — wait for the confirmation screen
- Remove the caliper-to-bracket bolts and support the caliper
- Remove the caliper bracket-to-knuckle bolts
Removing the Old Rotor
- Remove the rotor retention bolt (10mm socket) — torque is 5 Nm; this bolt locates the rotor during assembly and does not carry braking load
- The rotor should slide off the hub
- If seized: spray penetrating oil at the hub interface, wait 10 minutes
- Thread two M8 bolts into the rotor's push-off holes and tighten them evenly to press the rotor free
- Never strike the rotor friction surface — use a rubber mallet on the hub flange from behind if needed
Preparing the New Rotor
- Spray both rotor faces with brake cleaner and wipe until the shop rag comes away clean — removes the factory anti-rust oil coating
- Wire-brush the hub mounting surface down to bare metal
- Apply a thin layer of anti-seize paste to the hub face only — prevents corrosion bonding for the next removal
- Keep anti-seize completely clear of the rotor friction surfaces and wheel studs
Installing the New Rotor
- Slide the new rotor onto the hub, aligning the retention bolt hole
- Install the rotor retention bolt: 5 Nm (3.7 ft-lb) — 10mm socket
- Reinstall the caliper bracket with new bolts (P/N 1088969-00-B — Tesla specifies no bolt reuse):
- Front bracket to knuckle: 94 Nm (69.3 ft-lb)
- Rear bracket to knuckle: 83 Nm (61.2 ft-lb)
- Reinstall the caliper:
- Rear base caliper guide pin bolt (caliper-to-bracket): 26.5 Nm (19.5 ft-lb)
- Mark all torqued bolts with a paint pen — standard Tesla practice for visual verification at subsequent inspections
Brake Pad Note
While the caliper is off, inspect pad thickness. Below 4mm — replace now. The Tesla brake pad replacement guide covers this. The caliper is already removed; adding pads takes 20 minutes.
Reinstalling the Wheel
- Hand-thread all five lug nuts before lowering
- Lower vehicle off stands
- Torque lug nuts to 175 Nm (129 ft-lb) in a crossing star pattern
- Recheck lug nut torque after 50 miles — lug nuts can relax slightly on new rotor/hub interfaces
EPB Reset and Brake Bleed
Exiting EPB Service Mode (Rear Rotors)
After reinstalling the rear calipers, exit Service Mode:
- Controls > Service > Chassis > Brakes > EPB Service Mode
- Action Selection: Stop → Tap Run
The EPB motors will retract the piston and reapply. Confirm the parking brake indicator shows normal status on the instrument cluster before driving.
Bleeding the Brakes
If you pushed the caliper piston back far enough to raise the reservoir level, or opened any brake line fitting, bleed the system:
- Check fluid level in the reservoir — top up with DOT 3 only if low (Tesla specifies DOT 3 across all current Model 3/Y/S/X)
- Bleed sequence: right rear → left rear → right front → left front
- Use a one-person pressure bleeder or vacuum bleeder — both work well on Tesla's sealed system
- Bleed each corner until no air bubbles appear and the fluid runs clear
- If no lines were opened and the piston was only pressed back by hand, full bleeding is optional — but pump the brake pedal 10 times firmly with the car in Park before your first drive
Bed-In Procedure for New Rotors
This step is not optional. Proper bed-in transfers an even layer of pad material onto the new rotor surface and prevents vibration. Skipping it causes pulsation within 500 miles.
Standard Bed-In (OEM and Daily-Driver Pads)
- Find a safe, straight road with no traffic
- From 35 mph, apply moderate braking (60% pedal pressure) down to 5 mph
- Do not come to a full stop — even heat distribution is the goal
- Accelerate back to 35 mph; repeat 8–10 times
- From 45 mph, apply firm braking (80% pedal) down to 5 mph; repeat 5 times with 30-second cool-down intervals
- Drive gently for 5 minutes to cool the rotors
- Avoid hard braking for the first 200 miles
Performance Pad Bed-In (Power Stop Z23, EBC Yellowstuff, Hawk HPS)
High-performance compounds require a more aggressive bed-in cycle:
- From 45 mph, 5 moderate stops (not to standstill), 30-second cool intervals
- From 60 mph, 3 firm stops (80% pedal) to 5 mph, 45-second cool intervals
- From 70 mph, 2 near-threshold stops to 5 mph
- 5 minutes of gentle driving to cool
- Repeat the full sequence once more after a 30-minute cool-down
Cost Comparison
| Service Option | Per Axle (parts + labor) | Notes |
|---|---|---|
| Tesla Service Center | $600–900 | OEM rotors, work warranty |
| Independent Tesla shop | $350–650 | Mix of OEM and aftermarket |
| DIY — quality aftermarket | $150–250 | Your 2–3 hours |
| DIY — OEM Tesla rotors | $200–300 | Your 2–3 hours |
Total DIY savings on all four rotors: $300–700+
European Market Pricing (2026)
| Option | Per Axle |
|---|---|
| Tesla Service Center (DE/NL/FR) | €550–850 |
| Independent shop | €300–600 |
| DIY — aftermarket rotors | €90–180 |
| DIY savings vs. Tesla service | €350–650 |
Tesla Brake Caliper Types: What DIYers Must Know
This is where most generic brake guides fail Tesla owners. Tesla uses two fundamentally different front caliper designs depending on trim — and the piston retraction method differs completely.
Standard Trim (Model 3 RWD / Long Range, Model Y RWD / Long Range)
All Standard and Long Range front corners use a single-piston sliding caliper. The caliper floats on two slide pins and a single hydraulic piston pushes the inner pad against the rotor. Retracting the piston is straightforward: place an old brake pad or a flat piece of wood between the piston face and the caliper body, then compress with a C-clamp. No rotation required. This takes under 60 seconds per corner.
The rear Standard calipers integrate the EPB motor into the piston assembly. The piston is a screw-type that rotates clockwise as it retracts. You cannot compress it with a C-clamp alone — it will strip the internal threads. Enable EPB Service Mode (the motor retracts automatically) or use a cube-style wind-back tool that simultaneously pushes and rotates the piston. EPB Service Mode is simpler and the correct Tesla-approved method.
Performance Trim (Model 3 Performance, Model Y Performance)
The front corners on Performance models use a Brembo 4-piston monobloc caliper — the same unit found on European sports cars. Four pistons face each other across a rigid non-sliding caliper body.
Key differences:
- Tool required: A 4-piston spreader tool (or two C-clamps placed diagonally across opposing piston pairs). Standard single-piston tools will not compress all four pistons evenly.
- Pad wear pattern: Performance calipers wear pads differently — the inner and outer pads wear at the same rate (unlike sliding calipers where the inner pad typically wears faster). Inspect both faces when checking pad thickness.
- Rotor size: Performance front rotors are 355mm diameter. Installing a Standard 320mm rotor into a Performance caliper bracket is impossible — the caliper physically cannot mount over the undersized rotor.
- DIY difficulty: Intermediate for Standard; Advanced for Performance due to the 4-piston spreader requirement and higher bracket bolt torques.
The rear calipers on Performance models are the same EPB-integrated design as Standard trim. EPB Service Mode process is identical.
| Feature | Standard Front | Performance Front (Brembo) | Rear (all trims) |
|---|---|---|---|
| Type | Sliding, 1-piston | Fixed monobloc, 4-piston | Sliding, EPB-integrated |
| Piston retraction | C-clamp compress | 4-piston spreader tool | EPB Service Mode |
| Rotor size (M3/MY) | 320mm | 355mm | 320mm / 335mm (Perf) |
| Caliper bracket bolt | 94 Nm | 94 Nm | 83 Nm |
EV-Specific Rotor Rust: Why Teslas Are Different
This is the Tesla-specific wrinkle that most brake guides skip entirely.
In a conventional car the driver presses the brake pedal hundreds of times a day, keeping the rotor surfaces polished and rust-free through constant friction contact. In a Tesla, regenerative braking handles 70–80% of deceleration automatically — the mechanical brake pads barely touch the rotors during normal driving. In a week of urban commuting you may do fewer than 20 genuine mechanical brake applications.
The result: bare steel rotor surfaces sit exposed to rain, humidity, and road salt for days between hard brake uses. They rust. Fast.
Normal vs. Problem Rust
| Rust Type | Appearance | Safe? |
|---|---|---|
| Light surface bloom | Thin orange film, clears after 2–3 stops | Normal — ignore |
| Heavy surface oxide | Dark orange coating, visible from outside the wheel | Clears after 5–8 firm stops — monitor |
| Deep pitting | Pockmarks or flaking visible, orange dust still flying after 10 stops | Replace rotors |
| Lip rust | Heavy buildup on the outer edge lip only | Replace if lip exceeds 1.5mm in height |
If you park outside in a coastal, northern European, or winter climate and rarely use the highway where hard stops occur, check your rotors every 6 months for pitting — not just at the standard Tesla service intervals.
Rust-Resistant Rotor Coatings
Standard uncoated rotors are the worst choice for a Tesla. The better options:
- Geomet-coated — zinc-rich inorganic coating that protects the non-friction faces (hat, vane slots, edges) from rust without affecting braking. Survives 500+ hours of salt spray. Available from Power Stop, EBC, and Brembo.
- E-coated (electrophoretic) — similar protection level, slightly lower cost. Common on DBA 4000 series.
- Zinc flake / ZnFl — used on some OEM-replacement Brembo units; excellent EU-market durability.
For owners in Lithuania, Germany, Nordic countries, the UK, or the Pacific Northwest USA: Geomet-coated or e-coated rotors are not optional luxury upgrades — they are the right choice for EVs in these climates.
See the Tesla rust prevention and undercoating guide for additional protection options including underbody treatments that complement rotor coating on a high-mileage Tesla.
2026 Model-Specific Notes
Model 3 Highland (2024+)
The 2024 Model 3 Highland refresh carried over the same brake dimensions as the pre-refresh RWD and Long Range variants. Standard Highland: 320mm front and rear. Performance Highland: 355mm front, 335mm rear. No new part numbers were introduced for the brake hardware — OEM-equivalent Highland-specific rotor listings in aftermarket catalogs are marketing, not engineering.
One change worth knowing: the Highland's regenerative braking strategy was tuned more aggressively (up to 0.3g one-pedal stopping). This reduces mechanical brake use even further vs. the pre-refresh Model 3. Expect rotor life to trend toward the 150,000-mile upper end of the range for typical commuters.
Model Y Juniper (2024+)
The Model Y Juniper (2024 facelift, sold as 2025 model year in most markets) uses identical brake dimensions to the pre-refresh Model Y. Standard: 320mm. Performance: 355mm front, 335mm rear. Confirm your trim via Controls > Software > Additional Vehicle Information before ordering — Performance and Standard rotors are not interchangeable.
Model S (2021+ "Plaid" and Long Range)
The post-2021 Model S uses 355mm front / 365mm rear. The Plaid variant uses the same physical dimensions but runs significantly harder due to its 1,020 hp output and heavier curb weight (4,561 lb). Plaid owners who use launch control regularly should inspect rotors at 50,000-mile intervals rather than waiting for symptoms. The rear rotors in particular heat-cycle more aggressively on aggressive drivers.
Model X (2022+)
The current Model X tips the scales at 5,185–5,390 lb loaded. The front rotors carry significantly more load during hard stops vs. a Model 3/Y. Inspect front rotors at least annually on any Model X that tows or carries frequent passenger loads. Service center pricing for Model X is $750–1,100 per axle (vs. $600–900 for 3/Y) — the DIY saving is proportionally larger.
Model 2 / $25k Tesla (2025+)
The upcoming entry-level Tesla has not yet appeared in major aftermarket brake catalogs as of May 2026. If you own an early Model 2, source OEM rotors directly from Tesla or request part numbers from a Tesla Service Center before purchasing aftermarket.
Pre-Purchase Rotor Inspection for Used Tesla Buyers
Used Tesla listings rarely mention brake condition. A five-minute visual inspection before you sign can save you $300–700 in immediate repair costs — and gives you negotiation leverage if rotors are worn.
What to Check Without Tools
- Look through the spokes at the rotor face from the front. The surface should be smooth silver-gray with a slight machine finish. Orange streaks = surface rust (normal). Black glazing = heat damage. Deep radial grooves visible from arm's length = worn.
- Check the outer edge lip. Run your fingernail from the rotor surface over the outer edge. A raised lip taller than ~1.5mm means material has been lost — the rotor is near or below minimum spec.
- Look for heat cracks. Hairline cracks radiating from the center of the rotor face or around drilled holes indicate overheating — usually from aggressive track use or dragging parking brake.
- Ask for the service history. If the car has 60,000+ miles and no brake record, budget $300–700 for a rotor replacement.
What to Check With a Pocket Caliper ($10)
Measure rotor thickness at 2–3 points on the face. Compare against the minimum specs in the table above. If thickness is within 1–2mm of the minimum: budget for replacement immediately.
If the rotors need replacement on a used Tesla you're negotiating on, use the numbers from the Cost Comparison section above as your negotiation anchor.
Common Mistakes to Avoid
These are the most frequently reported errors from the Tesla DIY community:
1. Reusing the caliper bracket bolts.
Tesla's service manual requires new bolts (P/N 1088969-00-B). The bracket bolts are torque-to-yield fasteners designed for a single use — they stretch slightly at 94 Nm / 83 Nm to create the correct clamp load. Reused bolts can back off under thermal cycling and vibration. New bolts cost $8–12 per axle — this is not the place to save money.
2. Contaminating the rotor with anti-seize.
Anti-seize on the hub face is correct. Anti-seize anywhere near the friction surface, the wheel studs, or the pad slots is a contamination event that ruins both the rotor and the pads. Keep the compound confined to the hub register ring only.
3. Skipping EPB Service Mode on rear rotors.
The rear EPB piston is motor-driven and cannot be manually compressed like a front caliper. Forcing it risks stripping the internal threads. Enable Service Mode first, every time, no exceptions.
4. Installing new rotors over worn pads.
Pads worn below 4mm are uneven across their face. New rotors installed with these pads develop uneven deposits within 500 miles and exhibit pulsation — the exact problem you just paid to fix. If pads are under 4mm, replace them simultaneously. Refer to the Tesla brake pad replacement guide — the caliper is already off.
5. Skipping the bed-in procedure.
See the Bed-In Procedure section above. Skipping it deposits pad material unevenly in the first heat cycle and causes pulsation within 300 miles.
6. Not checking hub face runout before installing the new rotor.
A hub face with runout above 0.05mm transfers that runout directly to the new rotor. Measure at the hub flange with a dial indicator before installing. If runout is present, clean the hub face and re-measure; if it persists after cleaning, the hub bearing may need inspection — see the Tesla wheel bearing replacement guide.
7. Forgetting to recheck lug nut torque at 50 miles.
Lug nuts on a new rotor/hub interface can relax slightly as surfaces seat. Recheck to 175 Nm after 50 miles — mark your calendar before you leave the driveway.
After the Job: What to Check Next
Wheel Alignment
Rotor replacement alone does not disturb alignment geometry. However, if you replaced a control arm, tie rod, or strut in the same session, schedule a four-wheel alignment immediately — misalignment accelerates uneven rotor and tire wear exponentially. See the Tesla wheel alignment DIY guide for a full walkthrough, or the control arm replacement guide and tie rod end replacement guide if you're combining jobs.
Tire Rotation
If your tires haven't been rotated recently, this is the ideal time — wheels are already off, jack stands are in place. Combine it with a torque re-check at 50 miles. See the Tesla tire rotation guide for rotation patterns and intervals.
Winter Prep Timing
If you're doing this job in autumn: while the wheels are off, inspect brake hoses for cracking and apply a light coat of silicone dielectric grease to caliper slide pins. Frozen or sticky caliper slides are the most common cause of uneven rotor wear in winter climates. See the Tesla winter preparation guide for the full seasonal checklist.
Troubleshooting After Rotor Replacement
These are the five most common issues reported after a Tesla rotor swap and their causes:
1. Brake Pulsation Returns Within 500 Miles
Most likely cause: Incomplete or skipped bed-in procedure.
Driving to a full stop during the bed-in cycle (or skipping it entirely) deposits pad material in a single thick band rather than an even layer. Every subsequent revolution of the rotor hits that deposit and creates pulsation.
Fix: Return to the bed-in procedure. From 35 mph, 8 moderate stops to 5 mph without coming to a standstill. Then 5 firm stops from 45 mph. If pulsation does not improve after this, check rotor runout — a hub face runout issue (see the Lateral Runout section above) will be carried over to the new rotor.
2. Squealing or Squeaking Brakes After Installation
Most likely causes (in order):
- Anti-squeal compound missing or applied incorrectly — Apply a thin layer of ceramic brake lubricant to the back of the brake pads (the metal backing plate, NOT the friction face) and to the caliper slide pins. Do not let compound touch the pad friction surface or the rotor.
- Glazed pad surface — If the old pads were reused with new rotors and the pads have a glazed, shiny surface, lightly sand the pad face with 80-grit sandpaper to expose fresh compound. Then run a firm bed-in cycle.
- Bed-in still in progress — Light squealing is normal for the first 50–100 miles. If it disappears after that, no action needed.
- Rotor anti-rust coating not fully cleaned — New rotors ship with a factory oil coating. If brake cleaner was not applied before installation, residue on the friction surface causes temporary squeal.
3. Grinding Noise Immediately After Installation
Most likely cause: Debris between the pad and the rotor face — a small stone or metal chip dislodged during the job.
Fix: Jack the car, remove the wheel, inspect the rotor face and pad slot. Remove any debris. If the rotor face shows a fresh scratch from the debris, light surface scratches do not affect braking safety. Deep gouges — contact with the rotor at 8 measurement points with a micrometer and compare against minimum thickness.
4. Uneven Pad Wear After 1,000–2,000 Miles
One pad wearing significantly faster than the other on the same axle indicates a stuck caliper slide pin.
Fix: Remove the caliper, pull both slide pins from the bracket. They should slide freely by hand. Corroded or dry pins that resist removal are the cause. Clean with brake-specific cleaner, inspect the rubber boots for cracks (replace if torn), and relubricate with silicone-based brake caliper grease before reinstalling. Do not use petroleum-based grease — it degrades rubber boots.
5. Brake Pedal Goes to the Floor After Job
Air entered the brake lines during piston compression.
Fix: Bleed the affected corner(s) immediately. Tesla uses DOT 3 fluid — bleed sequence: right rear → left rear → right front → left front. Do not drive the vehicle until pedal feel is firm and consistent with pre-job. If the pedal remains soft after bleeding, check that the bleeder screw was fully closed after the bleed.
Caliper Slide Pin Service (Recommended Every Rotor Job)
Tesla caliper slide pins are often overlooked during rotor replacement. They require inspection and lubrication every time the caliper is removed:
- Pull each slide pin fully out of the bracket
- Inspect the rubber dust boot — replace if cracked or torn (seals fail in 5–7 years, particularly in winter climates)
- Wipe away old grease with a clean rag
- Apply a fresh coat of silicone brake caliper grease to the pin shaft
- Reinstall until the pin seats fully in the bracket
Properly lubricated slide pins are the most effective prevention against uneven rotor wear. A slide pin seizure left uncorrected will destroy a new rotor within 10,000 miles.
FAQ
How much does Tesla brake rotor replacement cost in 2026?
DIY: $150–250 per axle in rotors. Tesla Service Center: $600–900 per axle. Independent shops: $350–650 per axle. Total DIY savings across all four rotors: $300–700.
Do I need to reset the EPB (electronic parking brake) after replacing rear rotors?
Yes — enable EPB Service Mode before removing the rear calipers, and exit it after reinstalling. The EPB piston is electromechanical and cannot be simply compressed by hand. Skipping this step damages the motor threads.
Can I machine (resurface) Tesla rotors instead of replacing them?
Only if the rotor stays above minimum thickness after cutting. Machining costs $30–50 per rotor. Quality aftermarket rotors cost $70–120 each — replacement wins on value unless the rotor is relatively new.
Should I replace rotors and pads at the same time?
Replace pads any time they are below 4mm. New rotors with worn pads wear unevenly within 500 miles. Pads above 5mm remaining can be reused with new rotors.
Why are my new rotors rusting immediately after installation?
Normal — all bare steel rotors develop surface rust within hours, especially in humid climates. It clears after 2–3 brake applications and has no effect on braking performance.
Drilled vs. slotted vs. blank rotors for Tesla?
- Blank (OEM-style): Quietest, longest life, best for daily driving — recommended for most owners
- Slotted: Better heat and gas evacuation under hard use, slightly shorter service life
- Drilled: Looks aggressive, worst durability — prone to cracking under thermal cycling; avoid for any performance driving
How long do Tesla brake rotors last?
75,000–150,000 miles under normal driving. Regenerative braking reduces mechanical brake activation by 70–80%, so rotors outlast pads by a large margin. Frequent towers or track-day drivers should expect 50,000–80,000 miles.
Why do my Tesla rotors rust so fast?
Because regen braking handles most deceleration automatically, your mechanical brake pads barely touch the rotor surfaces during everyday driving — sometimes for days at a time. Bare steel oxidizes quickly without friction contact. Light surface rust that clears after 2–3 brake applications is normal. Deep pitting or rust that doesn't clear after 10 hard stops means the rotor is past safe use. Switching to Geomet-coated or zinc-plated rotors is the best long-term fix for owners in wet or winter climates.
What rotor coating lasts longest on a Tesla?
Geomet-coated rotors (zinc-rich inorganic coating) are the most durable option for Teslas. Because EVs use mechanical brakes infrequently, the rotor surfaces spend more time exposed to moisture — coated rotors survive dramatically longer than uncoated bare steel in these conditions. Power Stop Evolution and DBA 4000 series both offer Geomet or equivalent e-coated options for Tesla sizes.
Do I need wheel alignment after replacing Tesla brake rotors?
No — rotor replacement does not change alignment geometry. The hub and knuckle are not disturbed. If you're combining this job with control arm or tie rod replacement in the same session, then yes — get an alignment immediately after. Driving with suspension components replaced but not aligned will wear your new rotors unevenly within 5,000 miles.
Can I replace just the front OR rear rotors without doing all four?
Replace in axle pairs — both fronts together or both rears together. Never replace a single rotor on just one side of an axle. Mismatched braking surfaces create side-pull under hard braking. Doing one axle now and the other later when it wears out is perfectly fine.
What socket sizes do I need for Tesla brake rotor replacement?
21mm deep socket for lug nuts. 21mm for front caliper-to-bracket bolts. 18mm for caliper bracket-to-knuckle bolts (front and rear). 10mm for the rotor retention bolt. T30 Torx for the dust shield fastener. 1/2-inch drive torque wrench for the 94 Nm and 83 Nm bracket bolts; 3/8-inch drive torque wrench for the 5 Nm rotor bolt and 26.5 Nm guide pin bolt.
How do I know if the caliper needs replacement at the same time?
Inspect while the caliper is off: torn piston boot, corroded piston that resists compression, seized slide pins that won't pull free by hand, brake fluid weeping around the piston seal, or one pad significantly thinner than the other (indicating the caliper was dragging). Rebuild kits cost $40–80; remanufactured calipers cost $60–150. A failed caliper destroys new rotors within months.
How do I compress the pistons on Tesla Model 3 Performance / Model Y Performance front calipers?
Performance front calipers are Brembo 4-piston monobloc units — all four pistons must be compressed simultaneously. Use a 4-piston spreader tool or apply two C-clamps diagonally across opposite piston pairs. Standard single-piston wind-back cube tools will not work. Rear Performance calipers are the same EPB-integrated design as Standard — use EPB Service Mode.
Torque Specifications
Torque values verified against Tesla Service Manual (service.tesla.com) — April 2026
| Component | Torque | Notes |
|---|---|---|
| Wheel lug nuts | 175 Nm (129 ft-lb) | Star pattern; recheck at 50 miles |
| Front caliper bracket bolts (to knuckle) | 94 Nm (69.3 ft-lb) | REPLACE bolts — P/N 1088969-00-B |
| Rear caliper bracket bolts (to knuckle) | 83 Nm (61.2 ft-lb) | REPLACE bolts — P/N 1088969-00-B |
| Rear caliper guide pin bolt — base (caliper-to-bracket) | 26.5 Nm (19.5 ft-lb) | Rear sport lower: 71 Nm; upper: 34 Nm |
| Rotor retention bolt (10mm socket) | 5 Nm (3.7 ft-lb) | Rotor-to-hub locating bolt |
| Dust shield fastener (T30 Torx) | 8 Nm (5.9 ft-lb) | Separate fastener — not the rotor bolt |
While you have the brake system open, consider flushing your brake fluid — DOT 3 absorbs moisture and degrades over two years. It is a 45-minute job that is much easier with the calipers already removed.
Related Guides
- Tesla Brake Pad Replacement — Replace pads at the same time to avoid a return visit
- Tesla Brake Fluid Change — Flush fluid while calipers are already off
- Tesla Jack Points & Lifting Guide — Safe lift points for all models
- Tesla Squeaky Brakes Fix — Quick fixes before committing to a rotor swap
- Tesla Regenerative Braking Reduced — How reduced regen affects brake wear rates
- Model S Rear Caliper Motor Replacement — EPB motor issues on Model S
- Tesla Suspension Noise Fix — Rule out suspension as the vibration source before replacing rotors
🛠️ Tools Needed for This Repair
These are the tools I personally use and recommend. Using quality tools makes the job easier and safer.
-
Floor Jack (3-Ton)
-
Jack Stands (Set of 4)
-
Brake Caliper Tool Set
-
Torque Wrench
-
Brake Parts Cleaner
-
Anti-Seize Compound
-
iFixit Pro Tech Toolkit View on iFixit
We earn commissions from qualifying purchases through our affiliate partners. This helps support the site at no extra cost to you.